TrashMapper - iOS Project - Development - Part6
Table of Contents
Updates
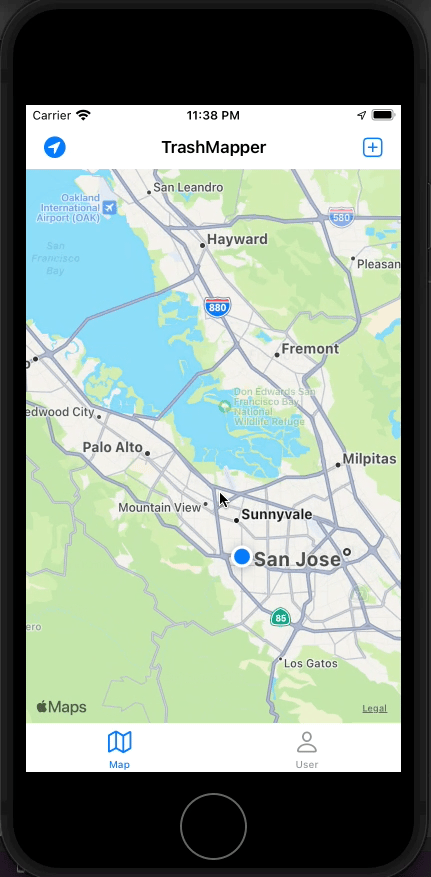
Most of the work I’ve been putting into the app recently has been around Firebase and MKAnnotation views for the map.
Learning about Firebase has certainly been a process. Different stacks to choose from (i.e storage, realtime db, firestore), but feel like I’m closing in on a good solution. Will cover some of the topics today.
As for the MKAnnotations, I spent a few hours today playing around with different ways to display an annotation view, thinking about the best way to structure my annotations given my Firebase utility and so on.
FireBase and PostModel
I’ve been reading a lot of Google’s help docs around FireBase, what makes a good data structure, and what features are best to use considering the apps use case. I couldn’t keep all these thoughts together so I created a Firebase Considerations.md file within my project folder as a reference. Here is what I’ve gathered so far.
| FireStore | Realtime DB |
|---|---|
| Collections | Big JSON file |
| Realtime Updates | Realtime Updates |
| Multi Region | Single Region |
| Added Security | Simplified security |
| Sort and Filter | No sorting/filtering |
| Charged per read/write, no matter size | Charged based on bandwidth/storage updates |
So a lot to consider. There is also the need of using FireBase Storage for file/image saving as noted per this link. Common answer to this type of question is that FireStore and Realtime DB are setup to capture non-image types where as storage is for larger files.
Firebase Flat (Denormalized) structure
I’ve also been looking more into how to setup a valid PostModel, what make sense for firebase and so on. Here is what I’ve learned so far along with considerations for the future development of the app.
Realtime DB stores everything as one large JSON file. This means there are no tables/records, something that normal SQL database would have. When elements are added to a JSON tree, the tree just adds on a node with the information and the tree grows.
Per the Google documentation on setting up a flat data structure, here was my first approach in setting one up. The JSON tree will have a users node that will grow per user created. Each user will have locations that they submit, so that part will grow continuously.
"Users" : {
    "user1" : {
        "Username" : "John"
        "Password" : "Applesseed"
        "TaggedLocations" : {
            "Location1" : {
                "photoURL" : some image
                "Longitude" : 134.54
                "Latitude" : 85.124
                "LocationDescription" : Trash near street
                "Date" : 24Jan 2022
            }
            "Location2" : {
                "photoURL" : some image
                "Longitude" : 235.4
                "Latitude" : 08.5
                "LocationDescription" : Trash in a park
                "Date" : 24Jan 2022
            }
        }
    "User2" : {...
    "User3" : {...}
}
The problem I can see with this is that as it grows there will be long iteration times going through the location data to pull into the app. It’s possible that a user can have 100’s of tagged locations, so will have to access the user, and then pull out the Tagged Locations which is nested.
Another approach is to setup the JSON tree as follows.
"Users" : {
    "user1" : {
        "Username" : "John"
        "Password" : "Applesseed"
        "Location1" : true
    }
    "User2" : {...}
    "User3" : {...}

"Locations" : {
    "Location1" : {
      "John" : True
      "User2" : false
      "User3" : false
      "photoURL" : some image
      "Longitude" : 134.54
      "Latitude" : 85.124
      "LocationDescription" : Trash near street
      "Date" : 24Jan 2022
    }
}
In this case, the locations are broken out and a two way relationship is formed via username and Location. There is the issue where per location, we have to add every user to the location and that could be a very long list. I’m honestly not sure which path is best, more research to come.
Image Capture and Display
The LocationDetailViewController has undergone multiple changes. The add photo button is now functional and prompts the user to select from either library photos or to take a picture.
The alert controller is not shown because I’m runnin the simulator on desktop. Here is the code snippet allowing the selection.
@IBAction func addPhotoButton(_ sender: Any) {
    print("add photo tapped")
    pickPhoto()
}

func pickPhoto() {
      if UIImagePickerController.isSourceTypeAvailable(.camera) {
          showPhotoMenu()
      } else {
          choosePhotoFromLibrary()
      }
}

func showPhotoMenu() {
        let alert = UIAlertController(title: nil, message: nil, preferredStyle: .actionSheet)

        let actCancel = UIAlertAction(title: "Cancel", style: .cancel, handler: nil)
        alert.addAction(actCancel)
        let actPhoto = UIAlertAction(title: "Take Photo", style: .default, handler: { _ in self.takePhotoWithCamera()})
        alert.addAction(actPhoto)
        let actLibrary = UIAlertAction(title: "Choose From Library", style: .default, handler: { _ in self.choosePhotoFromLibrary()})
        alert.addAction(actLibrary)
        present(alert, animated: true)

}
Pretty simple logic. Once the addPhoto button is pressed, we call pickPhoto. PickPhoto checks the source type available. If the camera is available, we ask the user if they want to select from library or take a live photo.
Based on the option selected, we call one of the two functions below.
func takePhotoWithCamera() {
    let imagePicker = UIImagePickerController()
    imagePicker.sourceType = .camera
    imagePicker.delegate = self
    imagePicker.allowsEditing = true
    present(imagePicker, animated: true, completion: nil)
}

func choosePhotoFromLibrary() {
    let imagePicker = UIImagePickerController()
    imagePicker.sourceType = .photoLibrary
    imagePicker.delegate = self
    imagePicker.allowsEditing = true
    present(imagePicker, animated: true, completion: nil)
}
Either choosePhotoFromLibrary or takePhotoWithCamera is selected. A picker is assigned and we go through the process of selecting a photo. Once a photo is selected, the LocationDetailViewController will act as the delegate to pull out the selected image.
//MARK: - Image Picker Delegate
extension CreatePostViewController : UIImagePickerControllerDelegate, UINavigationControllerDelegate {

    func imagePickerController(_ picker: UIImagePickerController, didFinishPickingMediaWithInfo info: [UIImagePickerController.InfoKey : Any]) {
        //After photo picked, grap photo from infokeys
        image = info[UIImagePickerController.InfoKey.editedImage] as? UIImage

        if let theImage = image {

            displayImageOnButton(theImage)
        }
        //display photo within button "addPhoto"

        dismiss(animated: true, completion: nil)
    }
}
All that’s done here is taking the image from info keys, casting it as a UIIMage, and then passing that image to displayImageOnButton.
func displayImageOnButton(_ image: UIImage) {
        addPhotoButton.setImage(image, for: .normal)
    }
While this works, it seems a little chaotic. At some point I will refactor and clean some of this up but for now it’s functional and works consistently. I’d prefer to ENUM the source type for either .library or .camera and combine the two functions (to pick a photo) possibly into one.
The delegate is also in prototype stage. I’m thinking of creating a separate file to handle the dataManagement for the PostModel, in which case I’ll call external functions within this delegate method to create a file path to the app bundle, generate a UUID for the photo, and finally upload that photo to fireBase without the need of saving it locally on device. Will need to check for errors in that path along the way to ensure a save was successful. To that point I should also add some error catches in this phase as well.
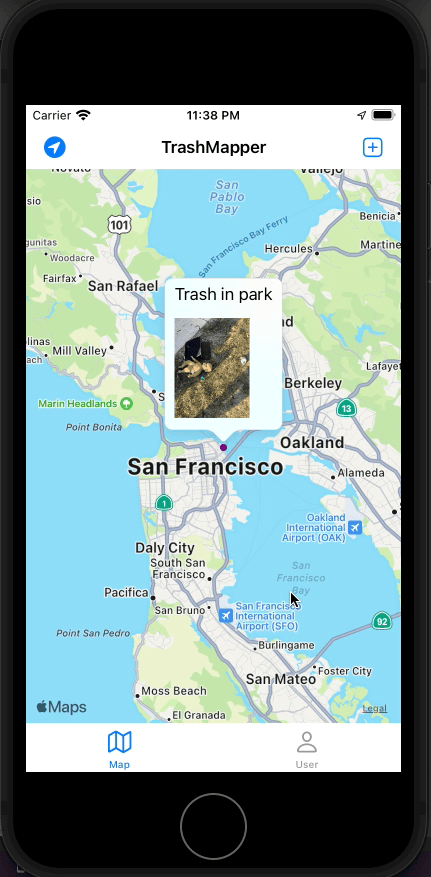
Annotations
Annotations are a pain. I haven’t fully understood how to setup the view, but I’m getting close.
For this demo run, I used Apple’s MapCallouts tutorial to help guide me. I created a TaggedLocationAnnotation and subclassed NSObject and MKAnnotation. I assigned a dummy coordinate and title within the annotation, and implement that within the MapViewController.
I’ve learned that the map annotations can be re-used similar to the tableview cells in a TableViewController. I extended the MapViewController class with MKMapViewDelegate, and also added a custom function per the tutorial I followed. In the viewDidLoad, I assigned the MapViewController as the delegate for MKMapView, registered the new TaggedLocationAnnontation, and then finally added the annotation to the mapView.
Adding the mapView annotation calls the delegate methods below. Within that method, the added annotation is passed through and continues along to the setupTaggedLocationAnnotation function. This customizes the pin to be purple, animated, and when clicked upon uses a markerAnnotationView with an image to display the dummy picture I put in the app bundle.
//MARK: - MapViewDelegate
extension MapViewController : MKMapViewDelegate {
    //create custom pin type, showing image, distance from user, information button
    //when tapped, should open an info card with the image, the description, and the distance from the user?
    func mapView(_ mapView: MKMapView, viewFor annotation: MKAnnotation) -> MKAnnotationView? {
        guard !annotation.isKind(of: MKUserLocation.self) else {
            return nil
        }


        var annotationView: MKAnnotationView?

        if let annotation = annotation as? TaggedLocationAnnotation {
            annotationView = setupTaggedLocationAnnotation(for: annotation, on: mapView)
        }

        return annotationView
    }

    //****************************
    private func setupTaggedLocationAnnotation(for annotation: TaggedLocationAnnotation, on mapView: MKMapView) -> MKAnnotationView {
        let identifier = NSStringFromClass(TaggedLocationAnnotation.self)
        let view = mapView.dequeueReusableAnnotationView(withIdentifier: identifier, for: annotation)
        if let markerAnnotationView = view as? MKMarkerAnnotationView {
            markerAnnotationView.animatesWhenAdded = true
            markerAnnotationView.canShowCallout = true
            markerAnnotationView.markerTintColor = UIColor.purple

            // Provide an image view to use as the accessory view's detail view.

            let pinImage = UIImage(named: "trash_in_park.jpg")
            let newPinImage = pinImage?.resized(withBounds: CGSize(width: 100, height: 100))


            markerAnnotationView.detailCalloutAccessoryView = UIImageView(image: newPinImage)
        }

        return view
    }

}
So this is really ugly. The viewController is getting bloated and difficult to follow with all of the extensions. I’m hoping to break out a new file that manages the views for the entire map, included the delegate methods. Not sure how that will go but will be a good learning point.
Another major challenge will be structuring the data fetched from firebase, pulling that into some array, and then adding all of the locations around the user.